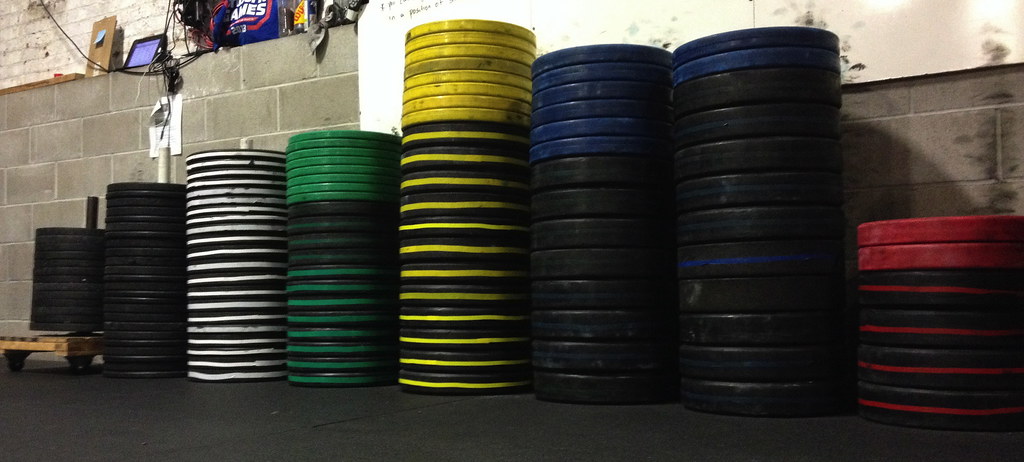
To offset some overhead costs, most young affiliates start out with economy bumper plates and kettlebells. The cheapest versions are usually all black, and the more of them you accumulate, the harder it can be for you and your members to properly identify during equipment selection and clean up. Unlabeled 10lb and 15lb bumpers can easily get stacked together and a sea of black kettlebells can lead to lots of individual inspection in a hunt for the desired "pood". Of course, more expensive versions come handily color-coded, which—when you can afford them, especially the bumpers—are totally worth it.
Until those purchases are feasible, you might have all black or mismatched equipment. Here are three easy steps to labeling equipment and making it consistent with more colorful and pricey counterparts:
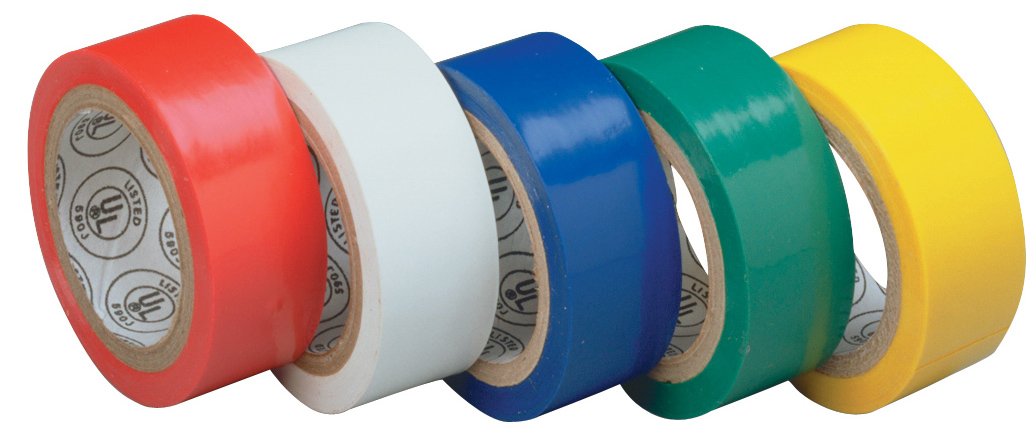
Step 1: Get colored electrical tape
Buy some Assorted Color PVC electrical tape, which just so happens to be sold in the exact colors you'll need. You can get this tape at most large hardware stores in the electrical section, Staples, some auto repair shops, and of course, online. The Scotch 1/2" M3 Tape works great for kettlebells and barbells while any 3/4" version works better visually for bumper plates. You can see the difference in the first picture between the thick and thinner tape on bumper plates—the 1/2’’ thinner blue tape on the 45lb bumpers tends not to show up as well as the thicker 3/4’’ tape.
You might have to purchase a lot of tape the first time given that each bumper plate’s circumference is 56’’, but it's a worthwhile investment since the tape holds up well over time. You can always do a few bumpers and see how it responds in your environment. 
Step 2: Clean your equipment
Wipe your equipment down with a dry cloth. If pieces are filthy, you might need to wash chalk or dirt off with a damp cloth. The HiTemp recycled rubber bumpers are a little more resistant to holding onto the tape both because they retain oil better and deform more with heavy use. If you recently purchased these bumpers, regularly wipe them down and use them for at least a month or two before labeling. The oil from manufacturing takes a while to fully get out of the bumpers and the glue won't stick properly until they are dried out. These will require a little more maintenance on your part but still work great. Tape on the smooth finish versions holds up very well and requires much less maintenance.
Step 3: Easy labeling 
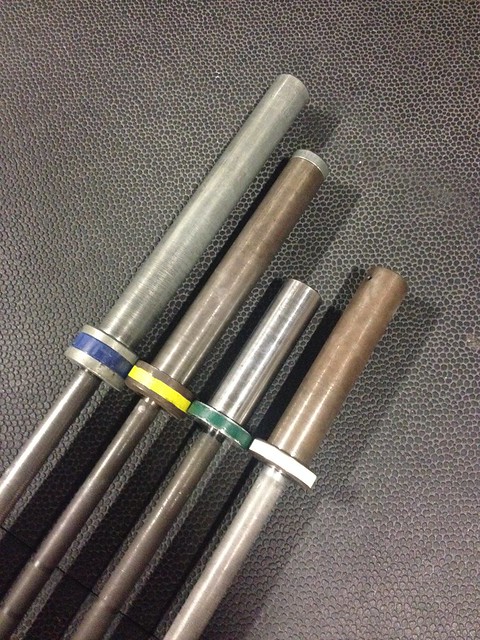
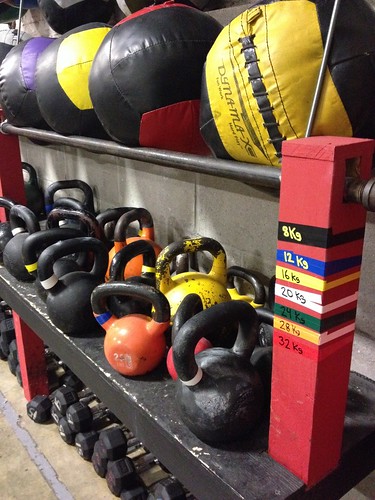
To get the tape on bumper plates, it's easiest to load a barbell on a rack so you can tack and rotate the tape around the revolving plate. If you've got enough tape, I recommend covering the diameter about one-and-a-half times so there's plenty of surface area contact between the tape. You'll notice that it's also quite elastic so make sure to wrap it with a little bit of tension and mat it down with your fingers. Kettlebells can be labeled by the base of the handle and barbells should be marked on the thick part of the sleeve.
Durability
The tape on kettlebells will rarely or ever need to be replaced. Since unloaded barbells usually spend some time on the floor, their tape will get the most chewed up, but it still functions well as an identifier. We touch up every four to six months or so on bars and plates.
Color Guide
White
15lb/5kg Bumpers
15lb/5kg Training Barbells Labeled kettlebell handles and key
20kg Kettlebells
Green
25lb/10kg Bumpers
22lb/10kg Barbells
24kg Kettlebells
Yellow
35lb/15kg Bumpers
33lb/15kg Barbells
16kg Kettlebells
Blue
45lb/20kg Bumpers
45lb/20kg Barbells
12kg Kettlebells
Red
55lb/25kg Bumpers
Specialty Bars or none
32kg Kettlebells
________________________
What are other ways to organize barbells, bumpers, and kettlebells?